Showing posts with label buttons. Show all posts

Saturday, December 06, 2014

a Prize, a Project, and a Parade

First, a big THANK YOU to Jo at Serendipitous Stitching for the lovely gifties she sent to me for winning her Halloween Blog Hop drawing.  Jo sent Blackbird Designs "Spell of the Moon" pattern,  a beautiful dark pumpkin colored piece of 32 ct. fabric to stitch on, and a lovely holiday card (my first of the season).  I will enjoy stitching this during the stitch alongs I have joined: Gifted GorgeousnessHalloween Ornies, and WIPocalypse.

Next is a recently completed project of mine.  This button wreath was simple to make and is "cute as a button" (well ... cute as a bunch of buttons).  You can find many of these online - just search "button wreath".

And last, but not least ... a parade!   We were lucky enough in Atlanta to get a break in the rain this morning for the annual Children's Healthcare Christmas Parade.  Here are a few photos:
Ringling Brothers Circus walked a giant tiger (balloon) down Peachtree Street.
Paddington Bear waves "Hello".
Let's not forget "Frosty the Snowman".
Santa and Mrs. Claus closed the parade, riding on a giant Rudolph float.  There were many marching bands, balloons, floats, and much more.  A wonderful parade!  Merry Christmas.


Monday, December 24, 2012

Just In the (St.) Nick of Time

Down to the wire ... I finished this Santa ornament just in time to get him on the tree for Xmas Eve.  Cute as a button!


He is cross stitched on plastic canvas, and measures 4-1/2" tall.  I backed him with bright blue felt and added a red ribbon hanger.


Here are a couple of other ornaments hanging on my tree this year:


This happy glass Jack O' Lantern is an ornament I picked up at the Atlanta Botanical Gardens last year.  I can't help smiling when I see him.


This hobby horse is one of the oldest ornaments on my tree. 

I made him sometime in the late 80's. 

He is made from aida fabric with some stitched details, a mane made from multiple colors of embroidery floss, ribbons and beads. 


Below is pictured a Christmas light display near where I live.
And To ALL a Good Night.

Saturday, October 29, 2011

Halloween Fun!

I've made several visits to the Atlanta Botanical Gardens this month, as the weather has been so wonderful here.  There have been lots of Halloween festivities going on!

The multitude of scarecrows is in place along the walks ... so much fun to see them all.

This "button skeleton" scarecrow is one of my favorites this year.  It is life sized & wonderful!  I especially love that every here & there appears a colored button ... hmmm.

This year I was able to attend the "Fest of Ale" and see the pumpkin carving contest (between Atlanta area chefs).  It was very crowded that evening and hard to get a good look while the actual carving was going on, but I was able to view the pumpkins up close after the event.

The winning pumpkin is pretty cute ... but I can't help but wonder how amazing the pumpkins would've been if the general public was allowed to enter the contest.

Saturday, April 23, 2011

a button egg

I always love to decorate eggs at Easter time!  I just finished making this egg last night.

I used a wooden egg that I had on hand, but these could be made with any egg form (styrofoam, plastic, or a hollowed real egg).

I glued pastel buttons onto the egg using white tacky glue.  I then filled in the spaces with pastel beads and microbeads. 

Sunday, February 13, 2011

Valentine Button Fairy

I recently made this Valentine button fairy for a swap. 

I found some lovely clip art for her face/head, printed on cardstock and colored with Indian ink pens and a clear glitter gel pen.  I then coated her head with clear polyurethane. 

I used a red chenille stem with a loop at the top and a set of square sparkly buttons to form her body.  I added red fibers along the length to add a bit of interest.  I then glued the head between the chenille stem loop and the top button.

I made 2 hearts, crocheted with red thread, to use as her wings.  I then glued them behind her upper body.

I think she turned out quite well.  Happy Valentine's Day!

Tuesday, December 21, 2010

Button Photos

Here are photos of the buttons I received from the Dick Blick one pound assortments: (click to view larger)

I finally had a chance to go through the buttons.  Each bag weighed slightly more than 1 pound. One bag contained nearly 850 buttons, and the other contained nearly 900 buttons! There were only 5 or 6 chipped or broken buttons in each bag. Some of the buttons did feel slightly dirty, but for $2.99 - I am not complaining.

I recieved a good variety of colors and sizes, a few shaped buttons (hearts, flowers, squares, triangle, etc..). Most of the buttons are the flat variety and perfect for crafting! Several buttons have brand names imprinted on one side, but that actually doesn't bother me. The buttons ranged from 1/4" up to 1-1/2" in size.

Also, on the topic of buttons ... I have run across some beautiful "button tree" projects online:


Makin' Projiks - This beautiful button tree is made by pinning buttons to a styrofoam cone. You don't need to glue the buttons & can reuse them later for another project if you choose


Balzer Designs - Create a lovely piece of heirloom art with a framed button tree. Tutorial by Diane Payne.

Wednesday, December 15, 2010

Winter Button Fairies

These mixed media button fairy art dolls were created for a swap in one of my art groups last month.

I used public domain images and edited them in a graphics program. I printed the images in black & white on heavy cardstock and embellished them with blue glitter glue. I coated the images with several layers of clear polyurethane, and added iridescent snowflakes.

I threaded white buttons and beads onto white chenille stems, bending hanging loops at the top. I then glued the heads to the top of the button bodies, and added white tulle netting for wings.

I made these before I purchased the big bags of buttons... but now I have plenty of buttons for my next project!

Thursday, November 25, 2010

birds & buttons!

I found a little time for art today ... so I whipped up some bird themed inchies.

Now let me tell you about the buttons ... I stumbled across a sale item at Dick Blick that I couldn't pass up: one pound bags of buttons for $2.99!

Wow! That is pretty cheap and I use lots of buttons! I bought a couple of bags, which arrived the other day. I'm pretty happy with them (however they do need to be washed off a bit). Each assortment is potluck. My assortment has a nice range of sizes and colors, there are lots of little buttons, a few shaped buttons (hearts, flowers, etc..), some glittery buttons. They are mostly flat buttons like the photo sample they show:

Craft Button Assortment

My assortment has more darker colored buttons than the photo - but there are lots of colors mixed in. Very few chipped or broken. When I get a chance to sort through them some more, I'll snap a photo.

Sunday, October 03, 2010

a handmade holiday home

I made this little house ornament yesterday from felt, embroidery floss, a few sequins, beads, and buttons.

Did you know that American Craft Week is being celebrated Oct 1-10?   If you love American craft, you may join the celebration - find events in your area here: Participants & Events, or support handcrafted goods and small businesses by buying handmade, or just go make something!

Speaking of handmade, the indie tot has put together a Holiday Toy Guide for 2010, which is filled with handmade and eco-friendly toys.  I am so delighted to be included this year!  You may download a free copy here: http://www.theindietot.com/Holiday-Toy-Guide-2010.pdf

Wednesday, July 07, 2010

a button fairy

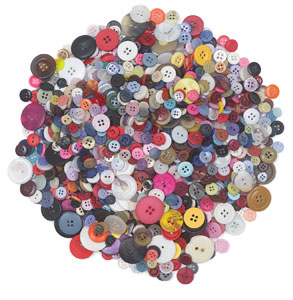
I made a button fairy for a swap in one of my art groups. This was
the first button fairy I ever made & think she turned out rather well!

Here are the details:
Her face and wings were created from public domain vintage art, which I resized and edited before printing. I hand colored both with Indian Ink art pens and added glitter glue to the wings, which I then coated with Diamond Glaze to give them a hard clear coat for stability.

I strung an assortment of buttons (the birdhouse is a button, too!) on a green chenille stem for the body, and bent it into a gentle curve leaving a loop at the top for hanging. I then stiched blue glass beads to the fronts of the buttons to cover the chenille and add some sparkle.

I added fibers to the back of the body and attached the head & wings. I added a tiny ribbon rose to complete the little garden fairy.

I enjoyed the project - I always love trying new things!
Related Posts with Thumbnails